
Structural & Mechanical Equipment Inspection
Aramco QC Notes Level-13
- Concrete Foundation Design
- Skid Design
- Skid Leveling
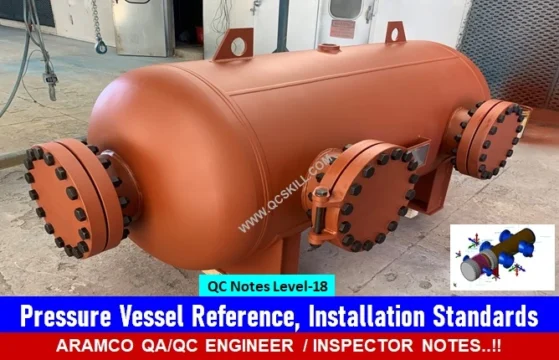
Epoxy Grout Installation Techniques for Skid Mounted Equipment
✅ Concrete Foundation Design
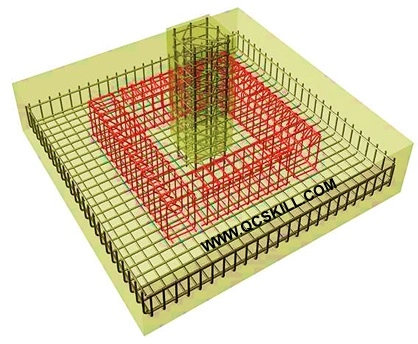
Concrete raw materials vary across the country so it is not possible to use common mix design. The design and placement shall be as per ACI standards. The installer involved with the concrete placement as well as the epoxy grout, should know the physical properties of the concrete used. Standard Portland base concrete takes 28 days to cure. Testing of physical properties should be done as per ASTM guidelines to ensure the foundation is properly cured and ready for grouting. It is very important to know what you have to work regarding the physical properties of the concrete. If there is problem with the concrete, such as low tensile or compressive strength, it can be address much easier and more cost effective before grouting.
Anchor Bolt design and installation is also important considerations. Most blocks are relatively shallow and free stretch of anchor bolts is sacrifice and impediment depth. This can be solved by going to a two piece bolt. The bottom is on the concrete block and has a coupling set just below grade. The skid beam is reinforced and holes drilled so the top piece of the anchor bolt can project through the top of the skid beam. This is to provide embedment and free stretch. Adjustable canister anchor bolts can help prevent bolt binding from misalignment at installation particularly if an accurate template is not used.
✅ SKID DESIGN
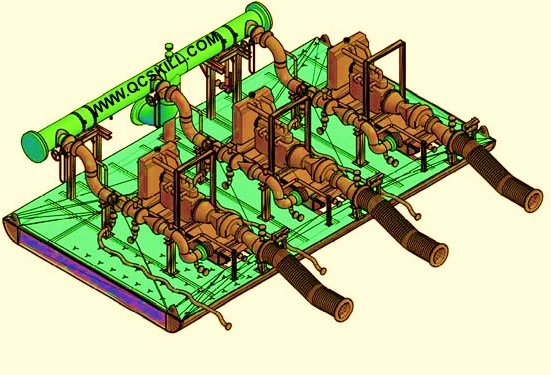
The structural steel design is determined by the manufacturer or packager. Hoe the skid is designed determines the type of grout installation. Some skids are rigid and strong enough to be supported only at the anchor bolt locations on epoxy chocks (typically 10” long x 12” wide x 2” deep). Others require the whole length of the longitudinal I beams to be grouted but not the transverse I beams. Most commonly both the longitudinal and transverse I beams will have to be grouted and at times, the inside cavity beneath the floor plate is also filled with either epoxy or cementatious grout. This is typically done to add mass for vibration reasons.
Access hole for grouting should be provided in the skid floor plate by the OEM or packer. The end user should specify these when purchasing. Access hole are very important when trying to flow any type of grout 10’ to 12’ across and 20’ to 30’ down the length of the foundation. The grout deep should be 2” minimum after chipping to provide adequate flow. Access hole also allows you to pour from the middle, cutting the flow distance in half.
They also provide inspection points to ensure that all I beams are fully supported. Be sure there are no blind or restricted flow areas in the skid design. One way a packer provided grout placement holes through the neutral axis of the beams. While most skids are designed to only supported by grout under the skid beams, occasionally the inside cavity of a skid will also need to be filled to provide mass. The inside cavity of the skid can be filled with either epoxy grout, cement grout or a concrete. Epoxy grout are more expensive, but perform better than cementatious grouts or concrete. Epoxy grouts are also resistant to most chemical attacks that cement base products cannot handle. Cement based products shrink as the hydrate or cure.
This can continue for a year or longer after installation. This shrinkage causes the cementatious grout or concrete to pull away from the inside of the skid. This causes or contributes to mass related vibration problems. This problem can easily be fixed by injecting an epoxy grout to the gap between the cement based product and the skid beams.
Mechanical locks can be welded to the inside cavity area to help prevent this problem. Filling the inside Cavity area with epoxy grout is a more expensive method but it is typically better performing and maintenance free. Cement based products are more economical and have limitations but have been used successfully for years. Some premium cementatious grout have built in expansive mechanism to help offset shrinkage.
✅ SKID LEVELING
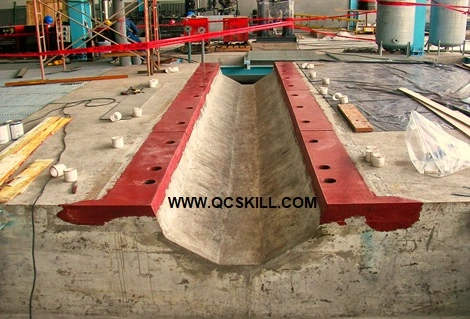
Jackscrew or other leveling system will be supplied by the OEM or packager. Jackscrews must be wrapped with tape or foam to prevent casting threads in the grout. Jackscrew must be removed after the grout has cured or they can cause cracks in the grout and concrete. As the skid and equipment grow thermally, the stresses they exert on the grout and concrete, if the jack screws are left in place, can cause cracks. Jackscrew landing plates should be made from round stock, sufficiently hard to prevent deformation, and all of the sharp edges should be beveled or radius. If wedges are used, then it is best to form around them for the epoxy grout pour.
They must also be removed, so they should be waxed or protected from bonding with the grout if you cannot form around them.
Be careful to cast any 90* corners (inside or outside corners) in the epoxy grout. Outside corners are blunted by adding a chamfer to the inside corner of the form. Inside corners are rounded by adding a piece of PVC pipe cut in quarters down its length to the outside corner of the form. The skid bottom in contact with epoxy grout should be sandblasted to NACE 1 white metal for the best bond to epoxy grout. If the bottom is primed, then the primer should be removed for the best bond.
The grout bond is only as good as, what it sticks to. A weak primer bond equals a weak grout bond. The skid can easily be blasted in the yard prior to installation. There is no problem bonding through a light film of rust. If the primer is compatible and it is to be left on the skid bottom then it must be abraded and the glossy top surface removed. The surface should then be solvent wiped with an evaporative solvent that leaves no residue behind which could act as the bond breaker.
Continue QC Notes Level-14 ⭕ How to Place Epoxy Grout When the Skid Has no Grout Access Holes
See More: Aramco Quality Standard
Download pdf: Epoxy Grout Installation Techniques for Skid Mounted Equipment


